AWS confusion…
Hosting on AWS can get confusing. Even trying to find the right service on AWS can get you frustrated. Which is why I decided to create a short guide on how to deploy a Flask app using Elastic Beanstalk.
Step 1: Creating your flask app
At this point you might already have your flask app ready. If so, I recommend just quickly checking if your project has what’s needed and then jumping to Step number 2. Below is the general structure of the project:
flask-eb-demo/
│
├── application.py         # Main Flask app (entry point)
├── requirements.txt       # Dependencies
├── Procfile
└── .ebextensions/
    └── python.config
First off is application.py, which is the app itself. Below is the very basic piece of code that we are going to use:
from flask import Flask

application = Flask(__name__)

@application.route('/')
def hello():
    return "Hello from Elastic Beanstalk!"

if __name__ == '__main__':
    application.run(debug=True) # Set to False for live apps
Next up is requirements.txt, which tells Elastic Beanstalk what dependencies are needed for the app to run. For this app, the only dependency is Flask, and we’re using the latest version (3.1.0) which works with all Python versions 3.9 or newer.
Flask==3.1.0And here’s the Procfile. (Note: the Procfile has no file extension)
web: gunicorn application:applicationAnd finally, last up is python.config, which is placed in the folder called .ebextensions. Elastic Beanstalk uses .ebextensions files to configure the environment. In this case, python.config tells it which file contains the Flask app.
option_settings:
    aws:elasticbeanstalk:container:python:
        WSGIPath: application.py
Step 2: AWS Prerequisites
It’s finally time to deploy our Flask app on Elastic Beanstalk. But first we need to set up a EC2 instance profile.
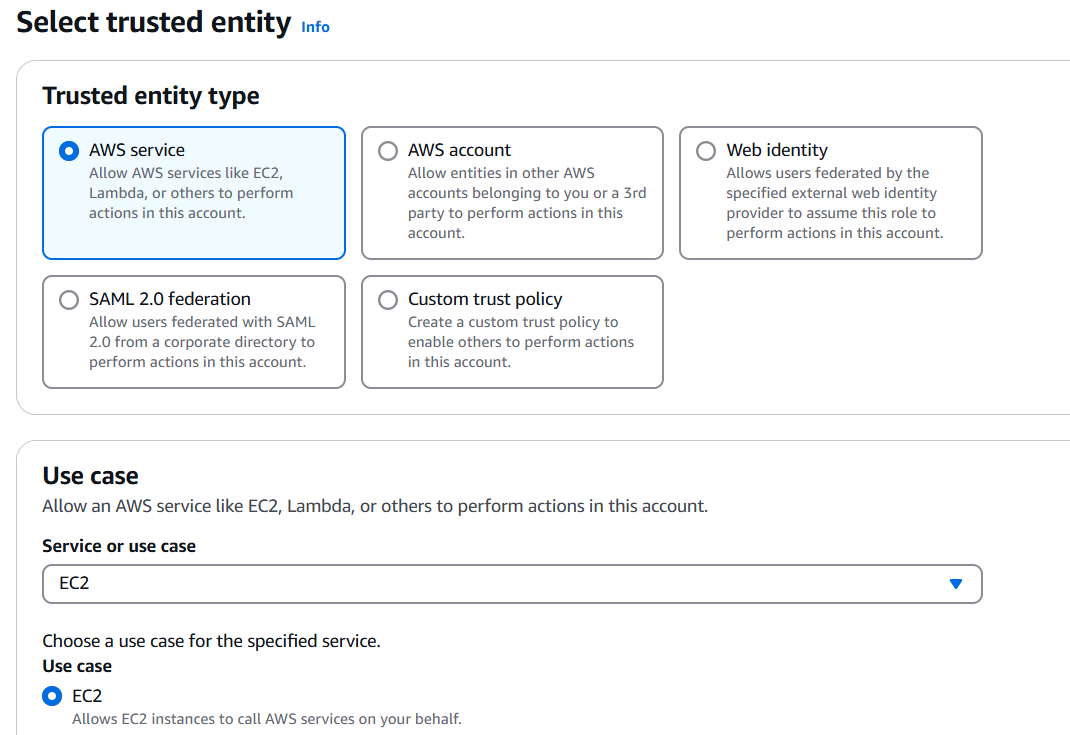
Log into AWS, navigate to the IAM Dashboard and press Roles and then Create role. Pick AWS Service as Trusted entity type and EC2 as use case. Press next and add these 3 permissions:
AWSElasticBeanstalkWebTier
AWSElasticBeanstalkWorkerTier
AWSElasticBeanstalkMulticontainerDocker

Then just press Continue and finally Create.
Step 3: Deploying
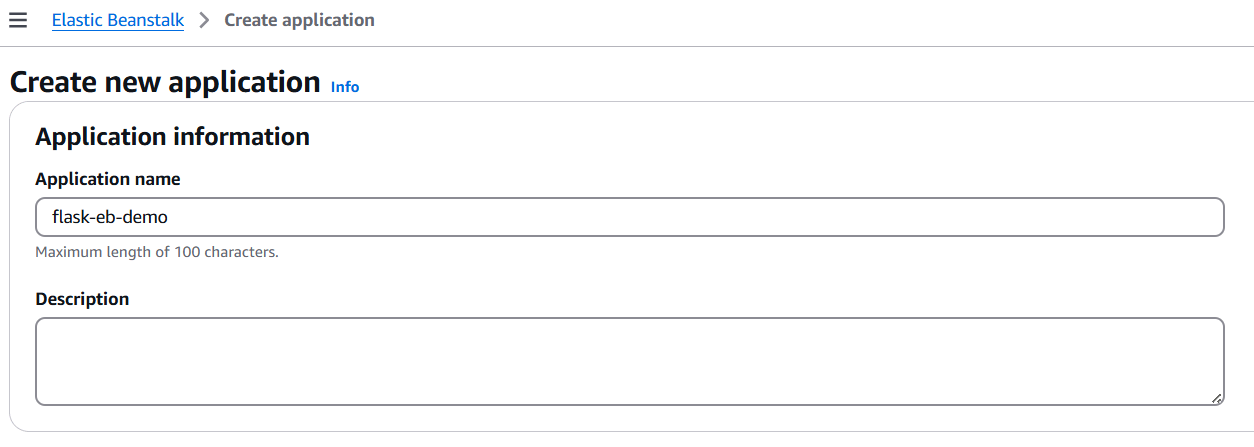
Navigate to Elastic Beanstalk and press Create application.

Choose any name you want. In this example, we’re using “flask-eb-demo”
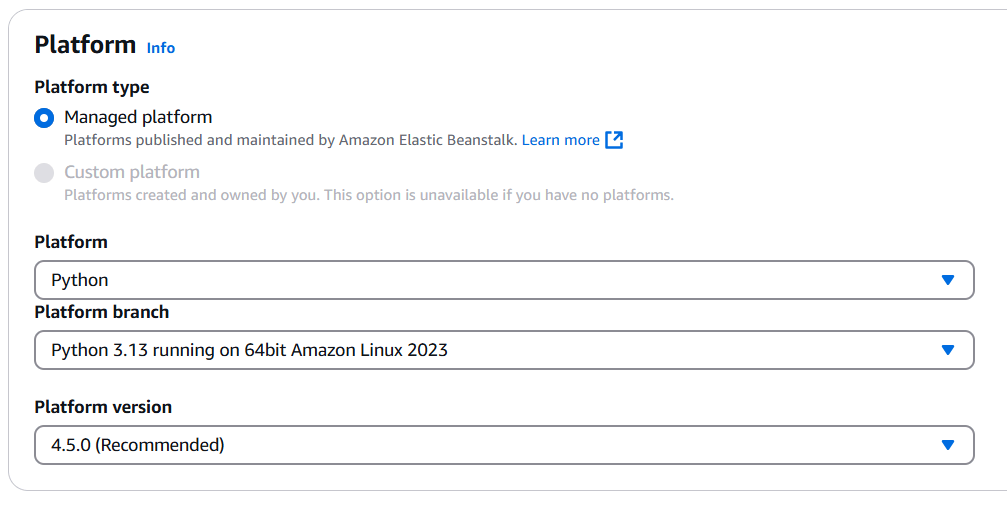
The press Create environment inside the app we just created. Choose Python and Amazon Linux 2023.

I recommend choosing Python 3.11 or 3.12 if you are using many older dependencies.
Continue downward and upload the ziped project. In my case flask-eb-demo.zip. (Note: Make sure the .zip file contains all the project files directly. Meaning that the .zip file should not contain a folder that contains the files.)

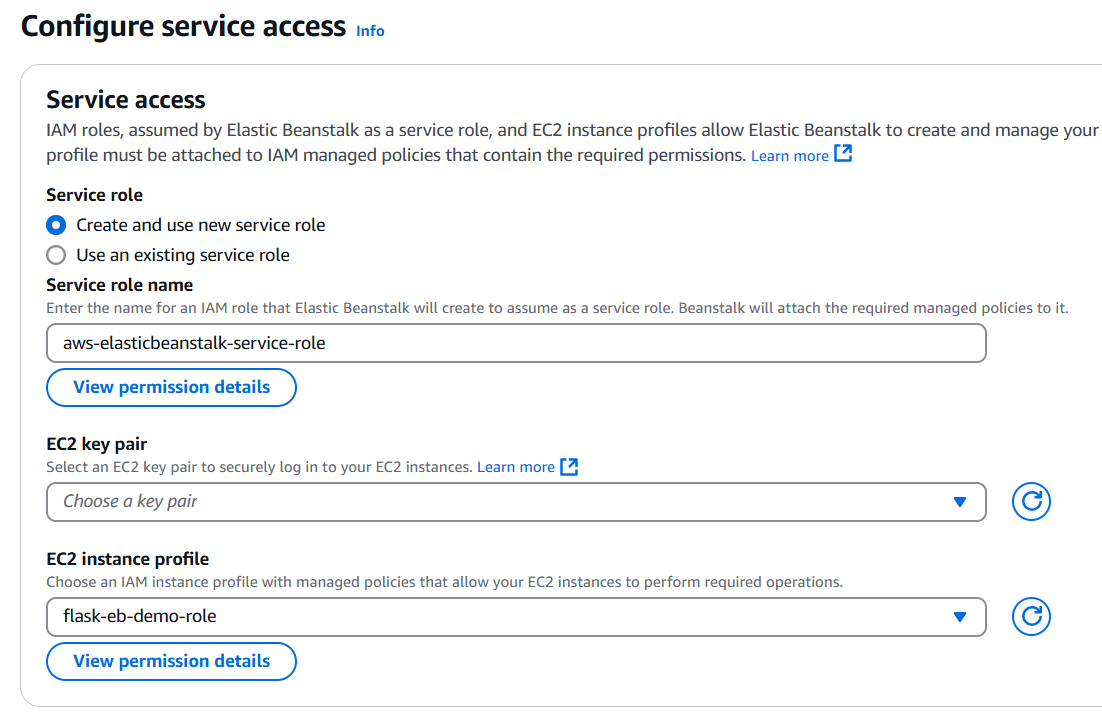
Press Continue until you end up at Configure service access. Pick Create and use new service role. Under EC2 instance profile, choose our newly created profile.

After that, press Skip to review and then finally, Deploy! If successful, you should see something like this:

Press the domain to see you new web app

And here it is!
I hope you got the help as you needed by reading this guide. If not, don’t hesitate to contact me on X or BlueSky! And remember, there’s a lot of alternatives to AWS. For example PythonAnywhere is my favorite, it’s simple to use and where I’m currently hosting Simplytics.dev, the affordable web analytics alternative.